Grab My Blinkies! :)


*Blogs I Like and Love To Visit


I CT For::
-
-
-
-
-
-
-
-
-
Just A Head's Up6 years ago
-
Dream League Soccer11 years ago
-
-
-
-
-
-
-
-
-
-
-
The End of the Tour (2015) HD11 years ago


I CT For:


Showing posts with label CT Tutorial. Show all posts
Showing posts with label CT Tutorial. Show all posts
Saturday, 31 August 2013
1 CT Tutorial and 2 CT Tags For Black Widow Creationz, Made Using PTU *Toxic Witch* Scrap Kit Made To match Tube Artist Wendy Gerber's PTU *Toxic Witch* Tube!
CT Tag #1

CT Tag #2 + Tutorial

This tutorial is my creation and is written by me,
any resemblance or any similarity to any other tutorial
is a co-incidence and is totally not intentional!
Written on: 18th July'2013
Materials/Supplies Needed for this tutorial:
1.Scrap Kit: PTU *Toxic Witch* Scrap Kit By Black Widow Creationz.
2.Mask: Any mask of your own choice and preference,
though I did not use any masks for this tag/tutorial..
though I did not use any masks for this tag/tutorial..
3.Tube: Matching Tube PTU *Toxic Witch* By Wendy Gerber.
4.Font: Any Font of your own choice and preference, I used a FTU Font.
5.Software/Program: I used Photoshop CS6, but any Photoshop will equally work!
6.Total knowledge and skill of the functions and features of Photoshop,
especially working with layers.
Elements And Papers Used From the Scrap Kit:
1. BWC_ToxicWitch_EL44
2. BWC_ToxicWitch_EL43
3. BWC_ToxicWitch_EL42
4. BWC_ToxicWitch_EL41
5. BWC_ToxicWitch_EL39
6. BWC_ToxicWitch_EL34
7. BWC_ToxicWitch_EL33
8. BWC_ToxicWitch_EL32
9. BWC_ToxicWitch_EL18
10. BWC_ToxicWitch_EL17
9. BWC_ToxicWitch_EL18
10. BWC_ToxicWitch_EL17
11. BWC_ToxicWitch_EL16
12. BWC_ToxicWitch_EL15
13. BWC_ToxicWitch_EL12
14. BWC_ToxicWitch_EL10
15. BWC_ToxicWitch_EL9
16. BWC_ToxicWitch_EL5
17. BWC_ToxicWitch_EL4
12. BWC_ToxicWitch_EL15
13. BWC_ToxicWitch_EL12
14. BWC_ToxicWitch_EL10
15. BWC_ToxicWitch_EL9
16. BWC_ToxicWitch_EL5
17. BWC_ToxicWitch_EL4
Procedure/Steps:
1. Open a New And Transparent Canvas and size it to 604x518.
2. BWC_ToxicWitch_EL39 paste and re-size to 80%,
place and position at the lower side of the canvas,
in the middle but towards the left hand-side.
place and position at the lower side of the canvas,
in the middle but towards the left hand-side.
3. BWC_ToxicWitch_EL9 and BWC_ToxicWitch_EL44,
paste and re-size them both to 80%, duplicate BWC_ToxicWitch_EL9
only once and place at the back of everything in the centre
of the canvas to make it look like the background and base
of the tag and on these place BWC_ToxicWitch_EL44
from the right hand-side of the canvas.
paste and re-size them both to 80%, duplicate BWC_ToxicWitch_EL9
only once and place at the back of everything in the centre
of the canvas to make it look like the background and base
of the tag and on these place BWC_ToxicWitch_EL44
from the right hand-side of the canvas.
4. BWC_ToxicWitch_EL16 and BWC_ToxicWitch_EL12,
paste and re-size to 20%, and place on the above
right hand-side corner of the canvas.
paste and re-size to 20%, and place on the above
right hand-side corner of the canvas.
5.Add the Tube(s).
Place it like you want to, it's not neccessary
that you need to place it like the above tag.
Place it like you want to, it's not neccessary
that you need to place it like the above tag.
6. BWC_ToxicWitch_EL42, BWC_ToxicWitch_EL32
and BWC_ToxicWitch_EL15, paste and re-size accordingly,
place the pot first and then the broom on it's right,
after that place the crow on the pot.
and BWC_ToxicWitch_EL15, paste and re-size accordingly,
place the pot first and then the broom on it's right,
after that place the crow on the pot.
7. BWC_ToxicWitch_EL43, BWC_ToxicWitch_EL10
and BWC_ToxicWitch_EL5, paste and re-size to your liking,
place and position on the left hand side of the tube.
and BWC_ToxicWitch_EL5, paste and re-size to your liking,
place and position on the left hand side of the tube.
8. BWC_ToxicWitch_EL33, BWC_ToxicWitch_EL4,
BWC_ToxicWitch_EL41, BWC_ToxicWitch_EL34,
BWC_ToxicWitch_EL17 and BWC_ToxicWitch_EL39,
paste and re-size them to your liking and choice,
place and position like a cluster of elements,
from left to right in the above given order of
elements, respectively.
BWC_ToxicWitch_EL41, BWC_ToxicWitch_EL34,
BWC_ToxicWitch_EL17 and BWC_ToxicWitch_EL39,
paste and re-size them to your liking and choice,
place and position like a cluster of elements,
from left to right in the above given order of
elements, respectively.
9. Add proper copyrights and licenses.
10. Add drop shadow to all elements and tube(s).
10. Add drop shadow to all elements and tube(s).
11. And at last save the tag as a PNG.
If any of you like my tutorial and tag, and use my tutorial
for any of your creations, please send them to me via e-mail
at ammu.creations2012@gmail.com, and I would love them to post
them on my blog! God bless you all! xo-xo
Thank You!
Scrap Kit's Preview
Scrap Kit's Preview

Matching Tube's Preview

Monday, 12 August 2013
CT Tag+Tutorial for Kandii Popz Designz, made using her PTU and Exclusive To Ismael Rac's Store *The XeracX Store*-*2013 Hot Baking Scrap Kit* paired with the matching PTU *2013 Hot Baking Tube* as well as a Pressie Tag for Artist *Ismael Rac*
CT Tag Followed By The Tutorial

This tutorial is my creation and is written by me,
any resemblance or any similarity to any other tutorial
is a co-incidence and is totally not intentional!
Written on: 7th July'2013
Materials/Supplies Needed for this tutorial:
1.Scrap Kit: PTU and Exclusive to XeracX Store *2013 Hot Baking*
Scrap Kit By Kandii Popz Creationz.
2.Tube: Matching Tube PTU *2013 Hot Baking* By Ismael Rac also at the XeracX
Store.
3.Font: Any Font of your own choice and preference, I used a FTU Font
called as *Dance Craze*
4.Software/Program: I used Photoshop CS6, but any Photoshop will equally work!
5.Total knowledge and skill of the functions and features of Photoshop,
especially working with layers.
6. Also a mask can be added of choice, though I just used a
plain circular vector mask in my PS for the background.
Elements And Papers Used From the Scrap Kit:
1. Bow1
2. Cake Tray
3. Chocolate
4. Cookie Jar
5. Cuppy 2
6. Flower 1
7. Flower 2
8. Frame 2
9. Glitter Spat
10. Measuring Cups
11. Milk
12. Mortar N Pessel
13. Over
14. P11
15. Scales
16. Sparkles 1
17. Stack Of Cookies
18. Tea Towel
19. Whisk
20. Wooden Spoon
Procedure/Steps:
1. Open a New And Transparent Canvas and size it to 700x700
2. Frame 2, paste and place in the middle
of the canvas.
3. Bow 1, paste and re-size to 40%,
place on the upper left hand-side of the frame.
Flower 1 And Flower 2, paste and re-size them
both to 35% each, and place on the upper
right-hand side of the frame. As well as
place the Glitter Splat behind the flower cluster
you just created, take reference to the above tag.
4. Oven, paste and re-size to 80%, duplicate
once and place in the center, within the frame.
5. Add the Tube(s).
6. Chocolate, Measuring Cups, Scales,
Milk, Stack Of Cookies and Sparkles 1,
paste and re-size them accordingly from
left to center of the canvas, like a cluster,
in accordance to the above tag.
7. Cake Tray, Whisk, Wooden Spoon,
Tea Towel, Cookie Jar, Cuppy 2
and Mortar N Pessel, paste and re-size them
accordingly from right to the center of the canvas,
like a cluster in reference to the above tag.
8. P11, paste and re-size to 90%,
place behind everything added until this
step and add a plain circular vector
mask to it, given as default in PS.
9. Add Drop Shadows and Inner Shadows,
To required elements and tube(s).
10. Add proper copyrights and licenses.
11. And at last save the tag as a PNG.
If any of you like my tutorial and tag, and use my tutorial
for any of your creations, please send them to me via e-mail
at ammu.creations2012@gmail.com, and I would love them to post
them on my blog! God bless you all! xo-xo
Thank You!
Pressie Tag

Scrap Kit's And Tube's Preview

Saturday, 10 August 2013
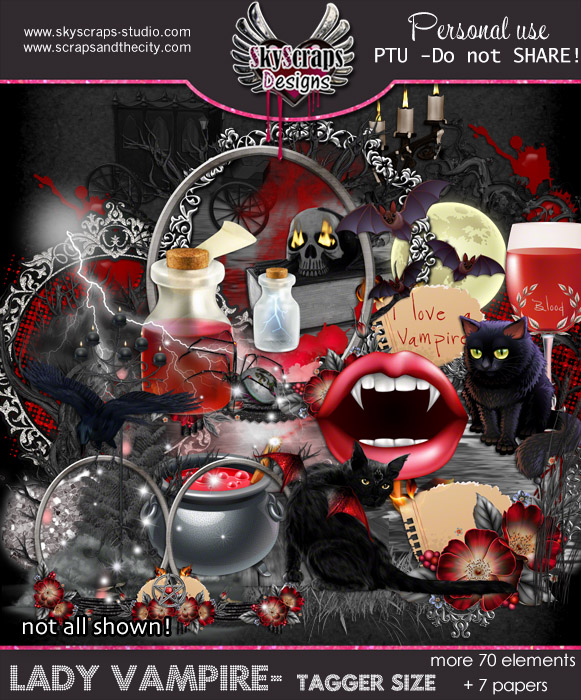
CT Tutorial for SkyScraps Designs PTU *Lady Vampire: Tagger Size* Scrap Kit, which is made to match Tube Artist Jose A. Cano's PTU and Exclusive *Lady Vampire* tube and a pressie tag!
CT Tag

This tutorial is my creation and is written by me,
any resemblance or any similarity to any other tutorial
is a co-incidence and is totally not intentional!
Written on: 10th' August' 2013
Materials/Supplies Needed for this tutorial:
1. Scrap Kit: PTU *Lady Vampire* Scrap Kit By SkyScrap Designs.
2. Mask: Any mask of your own choice and preference,
though I did not use any mask for this one,
but you can add a mask if you wish to.
3. Tube: Made to match with PTU *Lady Vampire* Exclusive tube By Jose A. Cano.
4. Font: Any Font of your own choice and preference, I used a FTU font.
5. Software/Program: I used Photoshop CS6, but any Photoshop will equally work!
5. Software/Program: I used Photoshop CS6, but any Photoshop will equally work!
6. Total knowledge and skill of the functions and features of Photoshop,
especially working with layers.
Elements And Papers Used From the Scrap Kit:
1. SkyScraps-LV-E1
2. SkyScraps-LV-E2
3. SkyScraps-LV-E3
4. SkyScraps-LV-E4
4. SkyScraps-LV-E4
5. SkyScraps-LV-E6
6. SkyScraps-LV-E7
7. SkyScraps-LV-E9
8. SkyScraps-LV-E10
9. SkyScraps-LV-E12
10. SkyScraps-LV-E14
11. SkyScraps-LV-E16
12. SkyScraps-LV-E17
13. SkyScraps-LV-E19
14. SkyScraps-LV-E21
15. SkyScraps-LV-E22
16. SkyScraps-LV-E23
15. SkyScraps-LV-E22
16. SkyScraps-LV-E23
17. SkyScraps-LV-E29
18. SkyScraps-LV-E31
19. SkyScraps-LV-E34
20. SkyScraps-LV-E36
21. SkyScraps-LV-E51
22. SkyScraps-LV-E52
23. SkyScraps-LV-E53
24. SkyScraps-LV-E55
25. SkyScraps-LV-E57
26. SkyScraps-LV-E61
27. SkyScraps-LV-E62
28. SkyScraps-LV-E72
18. SkyScraps-LV-E31
19. SkyScraps-LV-E34
20. SkyScraps-LV-E36
21. SkyScraps-LV-E51
22. SkyScraps-LV-E52
23. SkyScraps-LV-E53
24. SkyScraps-LV-E55
25. SkyScraps-LV-E57
26. SkyScraps-LV-E61
27. SkyScraps-LV-E62
28. SkyScraps-LV-E72
Procedure/Steps:
1.Open a New And Transparent Canvas and size it to 790x800.
2. SkyScraps-LV-E12 and SkyScraps-LV-E19, paste
and re-size to 80% each and duplicate a few times according
to your choice and preference and place on the blank canvas,
to look like a base for the tag, from the top of the tag until the middle.
and re-size to 80% each and duplicate a few times according
to your choice and preference and place on the blank canvas,
to look like a base for the tag, from the top of the tag until the middle.
3. SkyScraps-LV-E17 and SkyScraps-LV-E61, paste
amd re-size to 70% each and duplicate 2 times each of them,
and place at the bottom of the canvas, one above and aside
each other to form the ground/land for the tag's base.
4. SkyScraps-LV-E16, paste and re-size to 90%,
duplicate once and place on both sides of the canvas.
5. SkyScraps-LV-E55, paste and place in the center
of the tag, above everything added unitl this step.
amd re-size to 70% each and duplicate 2 times each of them,
and place at the bottom of the canvas, one above and aside
each other to form the ground/land for the tag's base.
4. SkyScraps-LV-E16, paste and re-size to 90%,
duplicate once and place on both sides of the canvas.
5. SkyScraps-LV-E55, paste and place in the center
of the tag, above everything added unitl this step.
6. Add the Tube(s) and apply drop shadow.
7. SkyScraps-LV-E6, paste and re-size to 50%,
place on the right-hand side upper area and
SkyScraps-LV-E4, paste and re-size into various
and different sizes, duplicate thrice and place on the
upper part of the canvas scattered from left to right!
8. SkyScraps-LV-E62, paste and re-size to 50%,
duplicate once and place on the right and left hand-sides
of where the tube is placed from behind the tube.
duplicate once and place on the right and left hand-sides
of where the tube is placed from behind the tube.
9. SkyScraps-LV-E51, paste and place on
the left hand-side of the tag, on the frame SkyScraps-LV-E55.
SkyScraps-LV-E10, paste and place next to SkyScraps-LV-E51.
the left hand-side of the tag, on the frame SkyScraps-LV-E55.
SkyScraps-LV-E10, paste and place next to SkyScraps-LV-E51.
10. SkyScraps-LV-E72, SkyScraps-LV-E1,
SkyScraps-LV-E2, SkyScraps-LV-E36,
SkyScraps-LV-E52, SkyScraps-LV-E23,
SkyScraps-LV-E7, SkyScraps-LV-E9,
SkyScraps-LV-E53, SkyScraps-LV-E31
and then again SkyScraps-LV-E23, paste
and re-size them all according to your choice
and preference and place from left to right on the lower
part of the tag, as cluster, to be more clear,
refer to the tag above.
11. SkyScraps-LV-E3 and SkyScraps-LV-E34,
paste and re-size to 35% each, place on the right hand-
side of the frame above the elements placed like a cluster.
SkyScraps-LV-E2, SkyScraps-LV-E36,
SkyScraps-LV-E52, SkyScraps-LV-E23,
SkyScraps-LV-E7, SkyScraps-LV-E9,
SkyScraps-LV-E53, SkyScraps-LV-E31
and then again SkyScraps-LV-E23, paste
and re-size them all according to your choice
and preference and place from left to right on the lower
part of the tag, as cluster, to be more clear,
refer to the tag above.
11. SkyScraps-LV-E3 and SkyScraps-LV-E34,
paste and re-size to 35% each, place on the right hand-
side of the frame above the elements placed like a cluster.
12. Add proper copyrights and licenses,
as well as the name and(or) phrase on the tag.
13. Add drop shadows and inner shadows
to tube and to those other elements you wish to.
13. Add drop shadows and inner shadows
to tube and to those other elements you wish to.
14. And at last save the tag as a PNG.
If any of you like my tutorial and tag, and use my tutorial
for any of your creations, please send them to me via e-mail
at ammu.creations2012@gmail.com, and I would love them to post
them on my blog! God bless you all! xo-xo
Thank You!
Pressie Tag

Scrap Kit's Preview
Matching Tube's Preview

Sunday, 28 July 2013
CT Tutorial for SkyScraps Designs PTU *Hot 911: Tagger Size* Scrap Kit, which I have paired with Tube Artist Alex Prihodko's PTU and Exclusive *Firefighter* tube!
CT Tag

This tutorial is my creation and is written by me,
any resemblance or any similarity to any other tutorial
is a co-incidence and is totally not intentional!
Written on: 28th July'2013
Materials/Supplies Needed for this tutorial:
1. Scrap Kit: PTU *Hot 911* Scrap Kit By SkyScrap Designs.
2. Mask: Any mask of your own choice and preference,
though I did not use any mask for this one,
but you can add a mask if you wish to.
3. Tube: Matched with PTU *Firefighter* Exclusive tube By Alex Prihodko.
4. Font: Any Font of your own choice and preference, I used a FTU font.
5. Software/Program: I used Photoshop CS6, but any Photoshop will equally work!
5. Software/Program: I used Photoshop CS6, but any Photoshop will equally work!
6. Total knowledge and skill of the functions and features of Photoshop,
especially working with layers.
Elements And Papers Used From the Scrap Kit:
1. SkyScraps-HOT911-pp5
2. SkyScraps-HOT911-e69
3. SkyScraps-HOT911-e63
4. SkyScraps-HOT911-e62
4. SkyScraps-HOT911-e62
5. SkyScraps-HOT911-e47
6. SkyScraps-HOT911-e23
7. SkyScraps-HOT911-e21
8. SkyScraps-HOT911-e14
9. SkyScraps-HOT911-e12
10. SkyScraps-HOT911-e11
11. SkyScraps-HOT911-e8
12. SkyScraps-HOT911-e6
13. SkyScraps-HOT911-e5
14. SkyScraps-HOT911-e4
15. SkyScraps-HOT911-e3
16. SkyScraps-HOT911-e2
15. SkyScraps-HOT911-e3
16. SkyScraps-HOT911-e2
17. SkyScraps-HOT911-e1
Procedure/Steps:
1.Open a New And Transparent Canvas and size it to 674x674.
2. SkyScraps-HOT911-pp5, paste and re-size to 650x650,
place and position in the middle of the canvas.
place and position in the middle of the canvas.
3. SkyScraps-HOT911-e14, paste and place
in the middle of the canvas on SkyScraps-HOT911-pp5.
4. SkyScraps-HOT911-e69, paste and re-size to 40%,
duplicate five times and place side-by-side eachother,
on the topmost area of the canvas on the elements
added till this very step. Also, SkyScraps-HOT911-e63,
paste and re-size into different sizes and place on the
lower area of the tag parallel to SkyScraps-HOT911-e69.
in the middle of the canvas on SkyScraps-HOT911-pp5.
4. SkyScraps-HOT911-e69, paste and re-size to 40%,
duplicate five times and place side-by-side eachother,
on the topmost area of the canvas on the elements
added till this very step. Also, SkyScraps-HOT911-e63,
paste and re-size into different sizes and place on the
lower area of the tag parallel to SkyScraps-HOT911-e69.
5. Add the Tube(s) and apply drop shadow.
6. SkyScraps-HOT911-e47, paste and re-size to 80%,
duplicate once and place on the lower area of the tag
above everything added until this step as ground.
7. SkyScraps-HOT911-e23, SkyScraps-HOT911-e12,
SkyScraps-HOT911-e6 and SkyScraps-HOT911-e4
paste and re-size them accordingly to your
choice and preference on the left-hand side of the tube,
so that it forms a nice cluster of elements,
for more help refer to the above tag.
SkyScraps-HOT911-e6 and SkyScraps-HOT911-e4
paste and re-size them accordingly to your
choice and preference on the left-hand side of the tube,
so that it forms a nice cluster of elements,
for more help refer to the above tag.
8. SkyScraps-HOT911-e21 and SkyScraps-HOT911-e3,
paste and re-size both of them accordingly to your
choice and preference in the middle of the tag,
on and in front of the tube.
paste and re-size both of them accordingly to your
choice and preference in the middle of the tag,
on and in front of the tube.
9. SkyScraps-HOT911-e11, SkyScraps-HOT911-e8,
SkyScraps-HOT911-e5, SkyScraps-HOT911-e2
and SkyScraps-HOT911-e1 paste and re-size to
your own choice and preference, place and position
as a cluster of elements along-side eachother
on the right-hand side of the tag.
10. SkyScraps-HOT911-e62, paste and re-size to 50%,
place on the right hand-side above the elements
added earlier so cover the empty space.
SkyScraps-HOT911-e5, SkyScraps-HOT911-e2
and SkyScraps-HOT911-e1 paste and re-size to
your own choice and preference, place and position
as a cluster of elements along-side eachother
on the right-hand side of the tag.
10. SkyScraps-HOT911-e62, paste and re-size to 50%,
place on the right hand-side above the elements
added earlier so cover the empty space.
11. Add proper copyrights and licenses,
as well as the name and(or) phrase on the tag.
12. Add drop shadows and inner shadows
to tube and to other elements you wish to.
12. Add drop shadows and inner shadows
to tube and to other elements you wish to.
13. And at last save the tag as a PNG.
If any of you like my tutorial and tag, and use my tutorial
for any of your creations, please send them to me via e-mail
at ammu.creations2012@gmail.com, and I would love them to post
them on my blog! God bless you all! xo-xo
Thank You!
Pressie Tag

Scrap Kit's Preview

Tube's Preview

Saturday, 20 July 2013
CT Tutorial for SkyScraps Designs PTU *Cleopatra: Tagger Size* Scrap Kit, which I have paired with Tube Artist Maxine Gadd's PTU *Maxine Gadd Individual Tube 34-3*
CT Tags


This tutorial is my creation and is written by me,
any resemblance or any similarity to any other tutorial
is a co-incidence and is totally not intentional!
Written on: 20th July'2013
Materials/Supplies Needed for this tutorial:
1. Scrap Kit: PTU *Cleopatra* Scrap Kit By SkyScrap Designs.
2. Mask: Any mask of your own choice and preference,
though I did not use any mask for this one,
but you can add a mask if you wish to.
3. Tube: Matching Tube PTU *Maxine Gadd Individual Tube 34-3* By Maxine Gadd.
4. Font: Any Font of your own choice and preference, I used a FTU font.
5. Software/Program: I used Photoshop CS6, but any Photoshop will equally work!
5. Software/Program: I used Photoshop CS6, but any Photoshop will equally work!
6. Total knowledge and skill of the functions and features of Photoshop,
especially working with layers.
Elements And Papers Used From the Scrap Kit:
1. SkyScraps-Cleopatra-e59
2. SkyScraps-Cleopatra-e58
3. SkyScraps-Cleopatra-e55
4. SkyScraps-Cleopatra-e51
4. SkyScraps-Cleopatra-e51
5. SkyScraps-Cleopatra-e49
6. SkyScraps-Cleopatra-e48
7. SkyScraps-Cleopatra-e47
8. SkyScraps-Cleopatra-e46
9. SkyScraps-Cleopatra-41
10. SkyScraps-Cleopatra-e39
11. SkyScraps-Cleopatra-e37
12. SkyScraps-Cleopatra-e26
13. SkyScraps-Cleopatra-e17
14. SkyScraps-Cleopatra-e11
15. SkyScraps-Cleopatra-e3
16. SkyScraps-Cleopatra-e2
15. SkyScraps-Cleopatra-e3
16. SkyScraps-Cleopatra-e2
17. SkyScraps-Cleopatra-e1
Procedure/Steps:
1.Open a New And Transparent Canvas and size it to 714x714.
2. Firstly what we will do is, create a base for the tag,
so that we can work on adding more stuff accordingly.
Take SkyScraps-Cleopatra-e39, paste and invert,
place on the top of the blank canvas.
so that we can work on adding more stuff accordingly.
Take SkyScraps-Cleopatra-e39, paste and invert,
place on the top of the blank canvas.
3. Now, take SkyScraps-Cleopatra-e11, paste and re-size
to 50%, duplicate once, place in the mid-section of the canvas,
below SkyScraps-Cleopatra-e39 and position side-by-side eachother.
4. SkyScraps-Cleopatra-e55, paste and place
on the canvas, so that is covers the whole canvas,
and looks like a border to everything added yet.
to 50%, duplicate once, place in the mid-section of the canvas,
below SkyScraps-Cleopatra-e39 and position side-by-side eachother.
4. SkyScraps-Cleopatra-e55, paste and place
on the canvas, so that is covers the whole canvas,
and looks like a border to everything added yet.
5. SkyScraps-Cleopatra-e58, paste and re-size to
different sizes, duplicate three times and
place on the top of the canvas, partially behind
one-another, so as to look like a mountain-range.
6. SkyScraps-Cleopatra-e51, SkyScraps-Cleopatra-e49 and
SkyScraps-Cleopatra-e41, paste and duplicate each a couple times
or thrice, re-size into different sizes and place in between
SkyScraps-Cleopatra-e58's layers, to make it look fuller
as well as for adding a nice and natural look.
7. SkyScraps-Cleopatra-e48 and SkyScraps-Cleopatra-e26,
paste and re-size to 15%, place SkyScraps-Cleopatra-e48
on the top right hand-side and SkyScraps-Cleopatra-e26
on the top left hand side, where it looks like land
on the lower portion of SkyScraps-Cleopatra-e58.
different sizes, duplicate three times and
place on the top of the canvas, partially behind
one-another, so as to look like a mountain-range.
6. SkyScraps-Cleopatra-e51, SkyScraps-Cleopatra-e49 and
SkyScraps-Cleopatra-e41, paste and duplicate each a couple times
or thrice, re-size into different sizes and place in between
SkyScraps-Cleopatra-e58's layers, to make it look fuller
as well as for adding a nice and natural look.
7. SkyScraps-Cleopatra-e48 and SkyScraps-Cleopatra-e26,
paste and re-size to 15%, place SkyScraps-Cleopatra-e48
on the top right hand-side and SkyScraps-Cleopatra-e26
on the top left hand side, where it looks like land
on the lower portion of SkyScraps-Cleopatra-e58.
8. Add the Tube(s) and apply drop shadow,
as well as inner shadow, according to your preference.
as well as inner shadow, according to your preference.
9. SkyScraps-Cleopatra-e46, paste and re-size to
80%, duplicate three times, and place above
and side-by-side one-another, to form the land/ground.
80%, duplicate three times, and place above
and side-by-side one-another, to form the land/ground.
10. SkyScraps-Cleopatra-e3, paste and re-size to 60%,
duplicate once, place on both sides of the tag on SkyScraps-Cleopatra-e46.
duplicate once, place on both sides of the tag on SkyScraps-Cleopatra-e46.
11. SkyScraps-Cleopatra-e47, paste and re-size to 40%,
place on the right side SkyScraps-Cleopatra-e3.
12. SkyScraps-Cleopatra-e1, SkyScraps-Cleopatra-e37,
SkyScraps-Cleopatra-e17, SkyScraps-Cleopatra-e59 and
SkyScraps-Cleopatra-e2, paste and re-size accordinly,
place from right to left, respectively on SkyScraps-Cleopatra-e46.
place on the right side SkyScraps-Cleopatra-e3.
12. SkyScraps-Cleopatra-e1, SkyScraps-Cleopatra-e37,
SkyScraps-Cleopatra-e17, SkyScraps-Cleopatra-e59 and
SkyScraps-Cleopatra-e2, paste and re-size accordinly,
place from right to left, respectively on SkyScraps-Cleopatra-e46.
13. Add proper copyrights and licenses,
as well as the name and(or) phrase on the tag.
14.And then save the tag as a PNG.
15. At last open the tag, add drop shadow
and emboss to whole tag, also again save as PNG.
15. At last open the tag, add drop shadow
and emboss to whole tag, also again save as PNG.
If any of you like my tutorial and tag, and use my tutorial
for any of your creations, please send them to me via e-mail
at ammu.creations2012@gmail.com, and I would love them to post
them on my blog! God bless you all! xo-xo
Thank You!
Pressie Tag
Pressie Tag

Scrap Kit's Preview

Tube's Preview

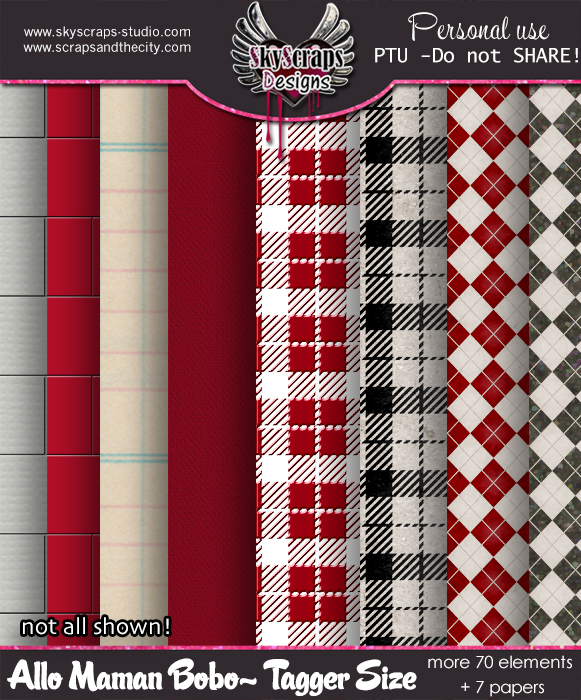
CT Tutorial for SkyScraps Designs PTU *Allo Maman Bobo: Tagger Size* Scrap Kit, which I have paired with Tube Artist Diana Gali's PTU *Nurse* tube, both exclusively available only at SATC!
CT Tags


This tutorial is my creation and is written by me,
any resemblance or any similarity to any other tutorial
is a co-incidence and is totally not intentional!
Written on: 20th July'2013
Materials/Supplies Needed for this tutorial:
1. Scrap Kit: PTU *Allo Maman Bobo* Scrap Kit By SkyScrap Designs.
2. Mask: Any mask of your own choice and preference,
though I did not use any mask for this one,
but you can add a mask if you wish to.
3. Tube: Matching Tube PTU *Nurse* By Diana Gali.
4. Font: Any Font of your own choice and preference, I used a FTU font.
5. Software/Program: I used Photoshop CS6, but any Photoshop will equally work!
5. Software/Program: I used Photoshop CS6, but any Photoshop will equally work!
6. Total knowledge and skill of the functions and features of Photoshop,
especially working with layers.
Elements And Papers Used From the Scrap Kit:
1. SkyScraps-AMB-E70
2. SkyScraps-AMB-E69
3. SkyScraps-AMB-E67
4. SkyScraps-AMB-E66
4. SkyScraps-AMB-E66
5. SkyScraps-AMB-E62
6. SkyScraps-AMB-E48
7. SkyScraps-AMB-E44
8. SkyScraps-AMB-E37
9. SkyScraps-AMB-E36
10. SkyScraps-AMB-E35
11. SkyScraps-AMB-E34
12. SkyScraps-AMB-E31
13. SkyScraps-AMB-E26
14. SkyScraps-AMB-E24
15. SkyScraps-AMB-E20
16. SkyScraps-AMB-E18
15. SkyScraps-AMB-E20
16. SkyScraps-AMB-E18
17. SkyScraps-AMB-E16
18. SkyScraps-AMB-E11
19. SkyScraps-AMB-E9
20. SkyScraps-AMB-E8
21. SkyScraps-AMB-E7
22. SkyScraps-AMB-E5
23. SkyScraps-AMB-E1
18. SkyScraps-AMB-E11
19. SkyScraps-AMB-E9
20. SkyScraps-AMB-E8
21. SkyScraps-AMB-E7
22. SkyScraps-AMB-E5
23. SkyScraps-AMB-E1
Procedure/Steps:
1.Open a New And Transparent Canvas and size it to 680x660.
2. SkyScraps-AMB-E62, paste and re-size to 80%,
duplicate once, place in the middle of the canvas,
one above the other, not on eachother.
duplicate once, place in the middle of the canvas,
one above the other, not on eachother.
3. SkyScraps-AMB-E66, paste and re-size to 40%,
duplicate twice and place in the middle on the canvas,
on SkyScraps-AMB-E62 and above eachother.
4. SkyScraps-AMB-E44, paste and place
in the middle of the canvas, above
everything added on the canvas until this step.
duplicate twice and place in the middle on the canvas,
on SkyScraps-AMB-E62 and above eachother.
4. SkyScraps-AMB-E44, paste and place
in the middle of the canvas, above
everything added on the canvas until this step.
5. SkyScraps-AMB-E26, paste and place
in the middle of the canvas, above everything
added on the canvas until this step, then open
SkyScraps-AMB-E70, paste and re-size to 30%,
duplicate once and add drop shadow to both,
place on both the top corners of SkyScraps-AMB-E26.
6. SkyScraps-AMB-E35, paste and re-size to 85%,
place in the left hand side corner, and then add
SkyScraps-AMB-E34, SkyScraps-AMB-E36, SkyScraps-AMB-69,
on SkyScraps-AMB-E35 according to your
liking and preference, or as shown in the above tag.
Also, SkyScraps-AMB-E48, paste and re-size to
50% and place partially behind SkyScraps-AMB-E35,
from SkyScraps-AMB-E35's right hand side.
7. SkyScraps-AMB-E67, paste and re-size to 80%,
duplicate three times, and place one above eachother,
and the other next to eachother, so as to form a ground for the tag.
in the middle of the canvas, above everything
added on the canvas until this step, then open
SkyScraps-AMB-E70, paste and re-size to 30%,
duplicate once and add drop shadow to both,
place on both the top corners of SkyScraps-AMB-E26.
6. SkyScraps-AMB-E35, paste and re-size to 85%,
place in the left hand side corner, and then add
SkyScraps-AMB-E34, SkyScraps-AMB-E36, SkyScraps-AMB-69,
on SkyScraps-AMB-E35 according to your
liking and preference, or as shown in the above tag.
Also, SkyScraps-AMB-E48, paste and re-size to
50% and place partially behind SkyScraps-AMB-E35,
from SkyScraps-AMB-E35's right hand side.
7. SkyScraps-AMB-E67, paste and re-size to 80%,
duplicate three times, and place one above eachother,
and the other next to eachother, so as to form a ground for the tag.
8. Add the Tube(s) and apply drop shadow.
9. SkyScraps-AMB-E37, SkyScraps-AMB-E31, SkyScraps-AMB-E24,
SkyScraps-AMB-E9, SkyScraps-AMB-E8, SkyScraps-AMB-E7,
SkyScraps-AMB-E5 and SkyScraps-AMB-E1, paste
and re-size according to your choice and preference,
place on the left hand side of the tube partially,
and position near each other as a cluster,
as shown and done in the above tag.
SkyScraps-AMB-E9, SkyScraps-AMB-E8, SkyScraps-AMB-E7,
SkyScraps-AMB-E5 and SkyScraps-AMB-E1, paste
and re-size according to your choice and preference,
place on the left hand side of the tube partially,
and position near each other as a cluster,
as shown and done in the above tag.
10. SkyScraps-AMB-E11, paste and re-size to 50%,
place next to the tube, on the right hand side,
and add the layer style of drop shadow.
place next to the tube, on the right hand side,
and add the layer style of drop shadow.
11. SkyScraps-AMB-E16 and SkyScraps-AMB-E18,
paste and re-size to 55%, place
on the left hand side of the tag on SkyScraps-AMB-E67.
12. SkyScraps-AMB-E20, paste and re-size to 80%,
add drop shadow, and make the shadow's color
as red and opacity to 55%, place
above SkyScraps-AMB-E18 and along-side SkyScraps-AMB-E16.
paste and re-size to 55%, place
on the left hand side of the tag on SkyScraps-AMB-E67.
12. SkyScraps-AMB-E20, paste and re-size to 80%,
add drop shadow, and make the shadow's color
as red and opacity to 55%, place
above SkyScraps-AMB-E18 and along-side SkyScraps-AMB-E16.
13. Add proper copyrights and licenses,
as well as the name and(or) phrase on the tag.
14.And at last save the tag as a PNG.
If any of you like my tutorial and tag, and use my tutorial
for any of your creations, please send them to me via e-mail
at ammu.creations2012@gmail.com, and I would love them to post
them on my blog! God bless you all! xo-xo
Thank You!
Pressie Tag
Pressie Tag

Scrap Kit's Preview: #1

Scrap Kit's Preview: #2
Tube's Preview

Friday, 19 July 2013
CT Tutorial for SkyScraps Designs PTU *Festive Evening: Tagger Size* Scrap Kit, made to match Tube Artist Zlata_M's PTU *Festive* Tube!
CT Tags


This tutorial is my creation and is written by me,
any resemblance or any similarity to any other tutorial
is a co-incidence and is totally not intentional!
Written on: 19th July'2013
Materials/Supplies Needed for this tutorial:
1.Scrap Kit: PTU *Festive Evening* Scrap Kit By SkyScrap Designs.
2.Mask: Any mask of your own choice and preference,
though I did not use any mask for this one,
but you can add a mask if you wish to.
3. Template: Any template with circular template layers,
will work nicely, it can be PTU or FTU,
I used a FTU Template by Millie Gomez.
(Template Number #113 By MPM)
3. Template: Any template with circular template layers,
will work nicely, it can be PTU or FTU,
I used a FTU Template by Millie Gomez.
(Template Number #113 By MPM)
4.Tube: Matching Tube PTU *Festive* By Zlata_M.
5.Font: Any Font of your own choice and preference, I used a FTU font.
6.Software/Program: I used Photoshop CS6, but any Photoshop will equally work!
7.Total knowledge and skill of the functions and features of Photoshop,
especially working with layers.
Elements And Papers Used From the Scrap Kit:
1. SkyScraps-Festive-PP1
2. SkyScraps-Festive-PP2
3. SkyScraps-Festive-PP5
4. SkyScraps-Festive-PP8
4. SkyScraps-Festive-PP8
5. SkyScraps-Festive-E79
6. SkyScraps-Festive-E75
7. SkyScraps-Festive-E70
8. SkyScraps-Festive-E69
9. SkyScraps-Festive-E35
10. SkyScraps-Festive-E34
11. SkyScraps-Festive-E24
12. SkyScraps-Festive-E16
13. SkyScraps-Festive-E11
14. SkyScraps-Festive-E10
15. SkyScraps-Festive-E5
16. SkyScraps-Festive-E3
15. SkyScraps-Festive-E5
16. SkyScraps-Festive-E3
17. SkyScraps-Festive-PP3
18. SkyScraps-Festive-E53
19. SkyScraps-Festive-E60
18. SkyScraps-Festive-E53
19. SkyScraps-Festive-E60
Procedure/Steps:
1.Open a New And Transparent Canvas and size it to 700x580.
2. SkyScraps-Festive-E53, paste and re-size to 70%,
duplicate three times, place in a scattered way
on the whole blank canvas.
duplicate three times, place in a scattered way
on the whole blank canvas.
3. SkyScraps-Festive-E11, paste and re-size to 50%,
duplicate four times and place in the right and
left hand side corner's top portions.
4. SkyScraps-Festive-E75, paste and re-size to 80%,
and place in the middle of the canvas, above
everything that has been added until this step.
duplicate four times and place in the right and
left hand side corner's top portions.
4. SkyScraps-Festive-E75, paste and re-size to 80%,
and place in the middle of the canvas, above
everything that has been added until this step.
5. Now open all the template layers on the canvas,
above all of the above added elements,
and add the papers SkyScraps-Festive-PP1,
SkyScraps-Festive-PP2, SkyScraps-Festive-PP3, SkyScraps-Festive-PP5
and SkyScraps-Festive-PP8, on the different-different template
layers, as shown and applied in the above tag.
6. SkyScraps-Festive-E60, paste and re-size to 40%,
place on the left hand side corner, on the back of
everything, to fill the little space created in between elements!
above all of the above added elements,
and add the papers SkyScraps-Festive-PP1,
SkyScraps-Festive-PP2, SkyScraps-Festive-PP3, SkyScraps-Festive-PP5
and SkyScraps-Festive-PP8, on the different-different template
layers, as shown and applied in the above tag.
6. SkyScraps-Festive-E60, paste and re-size to 40%,
place on the left hand side corner, on the back of
everything, to fill the little space created in between elements!
7. Add the Tube(s) and apply drop shadow.
8. SkyScraps-Festive-E10 and SkyScraps-Festive-E70,
paste and re-size both of them to 60%,
place on the right hand side of the tag.
paste and re-size both of them to 60%,
place on the right hand side of the tag.
9. SkyScraps-Festive-E35 and SkyScraps-Festive-E24,
paste and re-size both to 30%,
duplicate once and place on both sides of the tag.
paste and re-size both to 30%,
duplicate once and place on both sides of the tag.
10. SkyScraps-Festive-E5 and SkyScraps-Festive-E3,
paste and re-size both of them to 50% each,
and place behind the legs of the tube.
11. SkyScraps-Festive-E79, SkyScraps-Festive-E34 and SkyScraps-Festive-E16
paste and re-size all of them to 50%, place
and position them on both the lower right and
lower left sides of the tag.
paste and re-size both of them to 50% each,
and place behind the legs of the tube.
11. SkyScraps-Festive-E79, SkyScraps-Festive-E34 and SkyScraps-Festive-E16
paste and re-size all of them to 50%, place
and position them on both the lower right and
lower left sides of the tag.
12. Add proper copyrights and licenses,
as well as the name and(or) phrase on the tag.
13. Add drop shadow to all desired elements.
13. Add drop shadow to all desired elements.
14.And at last save the tag as a PNG.
If any of you like my tutorial and tag, and use my tutorial
for any of your creations, please send them to me via e-mail
at ammu.creations2012@gmail.com, and I would love them to post
them on my blog! God bless you all! xo-xo
Thank You!
Pressie Tag

Scrap Kit's Preview

Tube's Preview #1

Tube's Preview #2

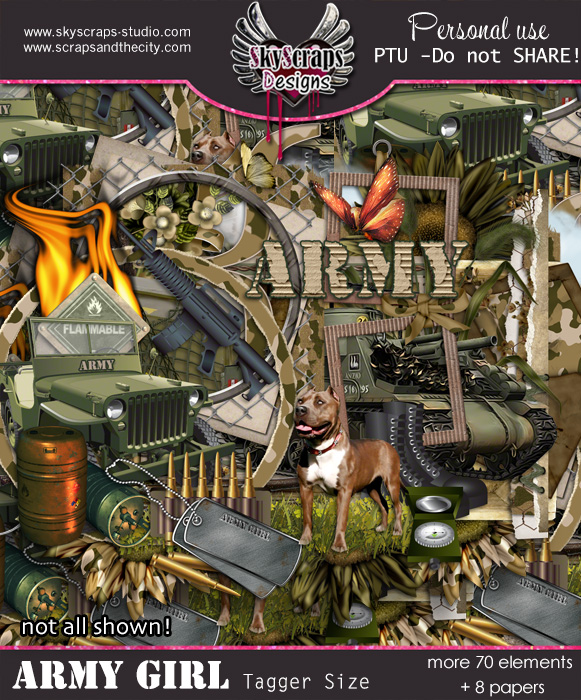
CT Tutorial for SkyScraps Designs PTU *Army Girl: Tagger Size* Scrap Kit, made to match Tube Artist Diana Gali's PTU *Army Babe* Tube!

This tutorial is my creation and is written by me,
any resemblance or any similarity to any other tutorial
is a co-incidence and is totally not intentional!
Written on: 19th July'2013
Materials/Supplies Needed for this tutorial:
1.Scrap Kit: PTU *Army Girl* Scrap Kit By SkyScrap Designs.
2.Mask: Any mask of your own choice and preference,
though I did not use any mask for this one,
but you can add a mask if you wish to.
3.Tube: Matching Tube PTU *Army Babe* By Diana Gali.
4.Font: Any Font of your own choice and preference, I used a FTU font.
5.Software/Program: I used Photoshop CS6, but any Photoshop will equally work!
6.Total knowledge and skill of the functions and features of Photoshop,
especially working with layers.
Elements And Papers Used From the Scrap Kit:
1. SkyScraps-E1
2. SkyScraps-E3
3. SkyScraps-E4
4. SkyScraps-6
4. SkyScraps-6
5. SkyScraps-E7
6. SkyScraps-E11
7. SkyScraps-E21
8. SkyScraps-E22
9. SkyScraps-E38
10. SkyScraps-E40 copie
11. SkyScraps-E51
12. SkyScraps-E53
13. SkyScraps-E55
14. SkyScraps-E65
15. SkyScraps-E68
15. SkyScraps-E68
Procedure/Steps:
1.Open a New And Transparent Canvas and size it to 695x695.
2. SkyScraps-E53, paste and re-size to 80%,
duplicate once, then place one each on
the either sides of the blank canvas.
duplicate once, then place one each on
the either sides of the blank canvas.
3. SkyScraps-E38, paste and duplicate once,
place behind everything and one on the upper half
portion of the canvas and one on the lower half,
so as to make it look like a background.
4.Then paste and re-size SkyScraps-E21 to 80%,
duplicate once and place one each on SkyScraps-E38.
place behind everything and one on the upper half
portion of the canvas and one on the lower half,
so as to make it look like a background.
4.Then paste and re-size SkyScraps-E21 to 80%,
duplicate once and place one each on SkyScraps-E38.
5. SkyScraps-E68, paste and duplicate three times,
and place between SkyScraps-E53 and
on SkyScraps-E38 and SkyScraps-E21.
6. SkyScraps-E51, paste and re-size to 90%,
place and position in the middle of the canvas,
above everything added until this step.
and place between SkyScraps-E53 and
on SkyScraps-E38 and SkyScraps-E21.
6. SkyScraps-E51, paste and re-size to 90%,
place and position in the middle of the canvas,
above everything added until this step.
7. Add the Tube(s) and apply drop shadow.
8. SkyScraps-E65 and SkyScraps-E11, paste
and re-size both of them to 50%, place
on the upper left and right hand side, respectively.
and re-size both of them to 50%, place
on the upper left and right hand side, respectively.
9. SkyScraps-E22, paste and duplicate three times,
and paste on the lower front portion of the canvas,
above everything added until this step.
and paste on the lower front portion of the canvas,
above everything added until this step.
10. SkyScraps-E55, SkyScraps-E1, SkyScraps-E4,
SkyScraps-E7, SkyScraps-E3, SkyScraps-E40 copie
and SkyScraps-E6 paste and re-size according to
your choice and preference and place on SkyScraps-E22,
from right hand side to left hand side, respectively.
SkyScraps-E7, SkyScraps-E3, SkyScraps-E40 copie
and SkyScraps-E6 paste and re-size according to
your choice and preference and place on SkyScraps-E22,
from right hand side to left hand side, respectively.
11. Add proper copyrights and licenses,
as well as the name and(or) phrase on the tag.
12.And at last save the tag as a PNG.
If any of you like my tutorial and tag, and use my tutorial
for any of your creations, please send them to me via e-mail
at ammu.creations2012@gmail.com, and I would love them to post
them on my blog! God bless you all! xo-xo
Thank You!
Pressie Tag

Scrap Kit's Preview #1
Scrap Kit's Preview #2

Tube's Preview

CT Tutorial for SkyScraps Designs and SkyScraps Pin-Ups PTU *Nina-2: Tagger Size* Scrap Kit, made to match her own PTU *Nina-2* Tube!
CT Tags


This tutorial is my creation and is written by me,
any resemblance or any similarity to any other tutorial
is a co-incidence and is totally not intentional!
Written on: 19th July'2013
Materials/Supplies Needed for this tutorial:
1.Scrap Kit: PTU *Nina-2* Scrap Kit By SkyScrap Designs.
2.Mask: Any mask of your own choice and preference,
though I did not use any mask for this one,
but you can add a mask if you wish to.
3.Tube: Matching Tube PTU *Nina-2* By SkyScrap Pin-Ups.
4.Font: Any Font of your own choice and preference, I used a FTU font.
5.Software/Program: I used Photoshop CS6, but any Photoshop will equally work!
6.Total knowledge and skill of the functions and features of Photoshop,
especially working with layers.
Elements And Papers Used From the Scrap Kit:
1. SkyScraps-NINA-E89
2. SkyScraps-NINA-E88
3. SkyScraps-NINA-E83
4. SkyScraps-NINA-E78
5. SkyScraps-NINA-E77
6. SkyScraps-NINA-E72
7. SkyScraps-NINA-E61
8. SkyScraps-NINA-E60
9. SkyScraps-NINA-E37
10. SkyScraps-NINA-E55
11. SkyScraps-NINA-E42
12. SkyScraps-NINA-E35
13. SkyScraps-NINA-E32
14. SkyScraps-NINA-E31
15. SkyScraps-NINA-E29
16. SkyScraps-NINA-E26
17. SkyScraps-NINA-E23
18. SkyScraps-NINA-E15
19. SkyScraps-NINA-E11
20. SkyScraps-NINA-E10
21. SkyScraps-NINA-E9
22. SkyScraps-NINA-E8
Procedure/Steps:
1.Open a New And Transparent Canvas and size it to 630x700.
2. Paste and place in the middle, over one another respectively,
SkyScraps-NINA-E83, SkyScraps-NINA-E77 and SkyScraps-NINA-E78.
3. SkyScraps-NINA-E42, paste and re-size to 50%,
and place on the back-right hand side
of SkyScraps-NINA-E78.
4. SkyScraps-NINA-E11 and SkyScraps-NINA-E10, paste and
re-size to 70%, and place on the either sides of the canvas.
5.Add the Tube(s) and apply drop shadow.
6. SkyScraps-NINA-E89, SkyScraps-NINA-E88 and SkyScraps-NINA-E60,
paste and re-size each of them to 50%,
place and position on the left hand side.
7. SkyScraps-NINA-E37 and SkyScraps-NINA-E29, paste and
re-size both of them to 70%,
place and position them on the right hand side.
8. SkyScraps-NINA-E32, paste and duplicate
three times, and place and position in the lower
portion of the canvas, in the front of everything
that has been added till this step.
9. SkyScraps-NINA-E26, SkyScraps-NINA-E55, SkyScraps-NINA-E61,
SkyScraps-NINA-E9, SkyScraps-NINA-E23, SkyScraps-NINA-E15,
SkyScraps-NINA-E31, SkyScraps-NINA-E35, SkyScraps-NINA-E8
and SkyScraps-NINA-E26, paste and re-size to your liking
and choice, from left hand side to right hand side,
in front of everything added until this step, respectively.
10. Add proper copyrights and licenses,
as well as the name and(or) phrase on the tag.
11.And at last save the tag as a PNG.
If any of you like my tutorial and tag, and use my tutorial
for any of your creations, please send them to me via e-mail
at ammu.creations2012@gmail.com, and I would love them to post
them on my blog! God bless you all! xo-xo
Thank You!
Scrap Kit's Preview

Tube's Preview

Subscribe to:
Posts (Atom)
About Me

- Amisha Anand
- Delhi, Delhi, India
- I am a 19 year old Bachelor of Journalism and Mass Communication Student, I am also doing my Bachelors in a Law School too, and after completing these two degrees of mine I will be starting an Animation and Graphic's Diploma Course! God has gifted me with a beautiful family and I also have a boyfriend who means the world to me, he is one of the most precious person God has gifted me and I love him to death! I also work as a CT team member for some great designers and I love my work, may it be studies or tagging!

Popular Posts
-
 CT Tags #1 ~For Ninaste~ ~For Derzi~ ~For Hania ~aka~ Veertje~ CT Tags #2 ~For Ninas...
 -
 CT Tag Pressie Tag CT Tag Created For Disturbed Scraps using PTU *Katy & Kitty* Scrap kit* For more details o...
 -
 CT And Pressie Tags #1 CT And Pressie Tags #2 CT Tag Created For Redefined Designs By Pamela using PT...
 -
 CT Tag CT Tag Created For Rieneke Design's using PTU *Autumn Days Scrap kit* For more details on this kit and ot...
 -
 CT Tag CT Tag Created For Redefined Designs By Pamela using PTU *Steampunk Freakshow Scrap kit* For more details on thi...
 -
 CT Tag Pressie Tag CT Tag Created For Lizquis Scraps using PTU *Butterfly* Scrap kit* For more details on this ki...
 -
 CT Tags This tutorial is my creation and is written by me, any resemblance or any similarity to any other tutorial ...
 -
 CT Tag Created For Starz Creationz *PTU Tickled Pink With Emo Scrap kit* As well as a Pressie Tag For Artist Zlata_Ma! Availabl...
 -
 CT Tag Created For Hania's Designs' *PTU Nina Scrap kit* As well as a Pressie Tag For Artist Lady Mishka! Availabl...
 -
 CT Tag Created For Starz Creationz using PTU Tender Bear Love Scrap kit* For More Details and Some Freebie Kits Visit ...
